So, being new at this, I’ll let you know how things go. As I’ve said, I’ve done all my research on what to do from instructions on the internet. Then I tried it out. I found that EVERYONE had different measurements on how to do this stuff, so it took me a few tries to figure out what measurements were actually needed. My hair goes a bit down to the middle of my neck, so hopefully these measurements might work for you. If you have a lot of hair, you might need to add up a 1/2 a tablespoon or two.
My Steps
The 1st thing is to not perm your hair the next time you need it. My last perm/relaxer was in October 2010. The 2nd thing is to start treating your hair as if it was already relaxed, and that’s what I’m doing now.
Make sure you take a look at the list I provided of all the stuff you will need before starting.
So…here we go
FIRST DAY
STEP 1: CLARIFYING – Wash hair with Baking Soda
Clarifying means you’re simply removing the buildup of stuff in your hair that makes it feel weighed down, limp, and/or extra greasy. Clarify only when you need a “clean slate” or to make your hair “clear”.
MIX
1/2 Cup of Baking Soda
2 Cups of Water
Pour mixture into Empty Water Bottle. Take off cap, and put 4mm hole in the center of the lid (My Hubby used a Reamer, you can also use a dremel…however you can to put a hold in the cap). Screw cap back on bottle. The hole in the cap will help pour solution into hair.
STEP 2: Apple Cider Vinegar Rinse (To also help Clarify hair)
MIX
1 Tbs Spoon of Apple Cider Vinegar
1 Cup of Water
Put in a empty Water Bottle, with the hole in the cap
NOTE: Use Apple Cider Vinegar BEFORE Conditioning helps to seal in the moisture better
STEP 2A: WASH HAIR
The Baking Soda and the Apple Cider Vinegar will separate from the water, so you’ll need to shake it up from time-to-time to get them back together. Wet you hair and use the Baking Soda mixture first. Apply all over hair, massage the hair, and Rinse out. Once you use up all the Baking Soda Mixture, then use the Apple Cider mixture all over the hair. Massage the hair, get it all over, and rinse out. NOTE: I must say, that I missed my bubbles that I used for shampoo while I was doing this…but while transitioning, gottah get rid of shampooing because it dries out the hair.
STEP 3: PROTEIN DEEP CONDITIONING
(See below on more Information on Protein Deep Conditioning)
MIX
1 egg (use egg white only, remove yolk so that the egg, when on your head while warming, doesn’t cook in your head)
2 Tbs honey
2 Tbs olive oil or almond oil
1 jar of Gerber Banana (Optional)
2 Tbs of Coconut Oil (Optional)
Always place this mixture on Wet Hair
SIDE NOTE: If you don’t want to mix another container of stuff, you can also use Mayonnaise as a Protein Deep Conditioning, which can also be applied on dry hair
After applying mixture to hair, Put on Plastic Cap/Shower Cap and wrap with a towel. Your body will supply heat for the oil when wrapped with towel.
Leave in for 20 minutes – 2 hours
STEP 4: Wash out Protein Mixture with a conditioner (which will also get rid of Mayonnaise smell if you used that). Any cheap Conditioner will do.
STEP 5: MOISTURE DEEP CONDITIONING
There are two main types of moisturizers: 1) water based and 2) oil based. “Oil based” moisturizers are best used when the hair is wet because it can trap in the moisture. “Water based” moisturizers are best used on dry hair because the water in the ingredients allows the other ingredients in the moisturizer to penetrate and moisturize. Since water actually penetrates the hair shaft, using a moisturizer with water as a base adds moisture back into the hair. Step 5, I considered it, as an “Oil based”
NOTE: You should always Moisturize after a Protein Conditioning to prevent breakage. More about this at the very bottom.
MIX
1/3 cup olive oil or Almond Oil
1/3 cup hot water
Apply this on wet hair. This will seal in the moisture
NOTE: Shea Butter and Oils only seals in moisture already in hair
Put on Plastic Cap/Shower Cap and wrap with towel. Wait 20min – 2hrs. Remember: Your body will supply heat for the oil when wrapped with towel.
STEP 6: Rinse out Hair
STEP 7: Towel Dry Hair. Let Hair Air out until 90% Dry. Just need Very Damp Hair. NOTE: Do not do twist out on wet hair (unless you have a lot of time for it to dry) or it will be very frizzy and just a bad twist out.
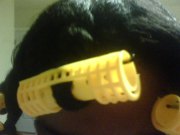
STEP 8: TWIST OUT
I’m using this as a transition hair style or protective styles which means that the hair style keeps your ends “protected.” What I read that you’re REALLY suppose to do is always have your ends tucked in and not left out for the elements to get to and cause breakage. On a YouTube video, one person said that having your hair down should be a treat and that it should mostly be UP for it to grow and stay healthy with no split ends. But I’m going to do this nightly, always moisturizing the ends, and have my hair out during the day. If it doesn’t work, I’ll try something else.
So what I do is part my hair in 4 sections. Make one (1) twist in each section of the hair, making a total of only four (4) twists. So you take a section of hair, then Put Coconut Oil at the ends, then separate the hair and twist the two pieces of hair together. Put a roller (3/4 inch perm rod) on the ends about 1/3 of the way up for each twist as you go.
NOTE: Use Coconut Oil sparingly, or not at all, during winter since it will harden with temperatures under 75F. Or Add equal parts of other oils. The other oils (olive, almond, jojoba) will help keep the coconut oil from freezing.
STEP 9: Put silk bonnet cap over hair or wrap up with silk scarf
STEP 10: Apply a small amount of Coconut Oil to your hands only (not to hair) in the morning. Carefully unravel twists. Start at roots.
STEP 11: DURING THE NEXT FOLLOWING DAYS
EVERY NIGHT: Use the Spray Bottle with water (can also add an oil like olive oil or almond oil in the bottle with the water) and damp the hair for moisture every night before you go to bed or in the morning (I consider this a “Water Based” moisturizing as stated in Step 5). The water and oil is your Spritz (3 part water: 1 part oil). Use the Wide Tooth Comb and gently detangle.
Let your hair air dry to 90% and (Repeat Step 8) Re-Twist hair
Cover with bonnet or silk scarf
NOTE: Only comb hair when it’s really wet and comb from the
ends to the roots. Hold the relaxed ends and gently comb through each section going up, without the tangles. Also finger comb is better than using an actual comb.
++++++++++++++++++++++++
WHEN TO DO PROTEIN TREATMENT
The Protein Deep Conditioning strengths hair, especially at the demarcation line and will stop or minimize breakage, and helps to reduce frizz and fly-away hair–IT WILL NOT MOISTURIZE.
NOTE: Water is the ultimate moisturizer. The moisture you apply needs to be held in by something. Oil.
Natural oils like jojoba, olive, carrot, or coconut oil seem to work best.
Only do a protein treatment when you need to. Do a hair strand test to evaluate whether or not you need a protein treatment
If your hair:
(When Wet or Dry) Stretches slightly and returns to its original length without breaking, you are balanced! Stick with maintaining!
(When Wet or Dry) Stretches a little more than normal then breaks, you need more protein in your regimen.
(When Wet or Dry)Stretches, stretches, stretches with no significant breakage yet, add a bit more protein to your regimen.
(Wet)- Feels weak, gummy, mushy, or limp, you need to add more protein to your regimen.
(Wet or Dry) Experiences very little to no stretching, and simply snaps or breaks, you need to increase the moisture in your regimen.
(Dry) Feels rough, tough, hard, dry, tangly, brittle, or any combination of those, you need more moisture in your regimen