4th WEEK – Transitioning from Relaxed to Natural Hair

Posted on

We’re at a Month now. Week 4, which I consider Step 14.

STEP 14: AT FOURTH WEEK CLARIFY & PROTEIN CONDITIONER

Start back over with Step 1 – Step 11 where you Clarify, Deep Condition with Protein and follow it up with a Moisturize Conditioning. You might not need to do the Protein (do test below) so just do the Moisturizing Conditioning (Step 5).

ALSO: Trim hair at this time, and do this while the hair is wet

On Days you need to wash but don’t have time for Deep
Conditioning, simply wash with a cheap Conditioner only

STEP 15 – SECOND MONTH: Alternate weeks between Moisture Deep Conditioning,
Hot Oil Conditioning and Protein Deep Conditioning/ Moisture Deep
Conditioning.  REMEMBER: Always follow
Protein with Moisture Conditioning or it will dry out and break. You should
always follow your protein Deep Conditioning with a moisturizing Deep
Conditioning to maintain protein/moisture balance. Hair that is properly
proteinated absorbs moisture more efficiently because water
molecules bind easily to a sound protein structure within the
hair.


REMEMBER: Only comb hair when it’s really wet and comb from
the ends to the roots.  Hold the relaxed
ends and gently comb through each section going up, without the tangles.  Also finger comb is better than using an
actual comb.


STEP 16: BREAKAGE

Never let your hair get dry. 
It is important to condition, condition, condition! Moisturize daily with a spritz (3 part water, 1 part oil).. Also,
trim your hair gradually to get rid of the straight ends — this aids in
helping the hair avoid breakage. Also, avoid breakage by using a wide tooth
comb, conditioning the hair regularly, and by giving your hair a hot-oil deep
conditioning treatment. This is essential to restore moisture and balance.


STEP 17: TWIST OUT

Make this mixture and put in after a freshly washed
hair.  Only use it when you haven’t done
a conditioning in awhile and your hair doesn’t already have a lot of oil in it.


MIX

1 Tbs Coconut Oil

1/2 Tbs Aloe Vera Gel

1/4 Teaspoon Honey (NOT Tablespoon. Teaspoon. Use very
little–Like a Dab or else hair will be really hard)

1 1/2 Tbs Olive Oil or Almond Oil (Optional, but consider
using during winter months)

+++++++++++

WHEN TO DO PROTEIN TREATMENT

If your hair:

(When Wet or Dry) Stretches slightly and returns
to its original length without breaking, you are balanced! Stick with
maintaining!

(When Wet or Dry) Stretches a little more than normal then
breaks, you need more protein in your regimen.

(When Wet or Dry)Stretches, stretches, stretches with no
significant breakage yet, add a bit more protein to your regimen.

(Wet)- Feels weak, gummy, mushy, or limp, you need to add
more protein to your regimen.

(Wet or Dry) Experiences very little to no stretching, and
simply snaps or breaks, you need to increase the moisture in your regimen.

(Dry) Feels rough, tough, hard, dry, tangly, brittle, or any
combination of those, you need more moisture in your regimen


3rd WEEK – Transitioning from Relaxed to Natural Hair

Posted on

Okay, we’re on Week 3, which is Step 13 on my list. And…guess what?  We’re conditioning again!  Yep! Gottah keep that hair breakage away.

STEP 13: THIRD WEEKEND/WASH: HOT OIL TREATMENT

On Step 5, The Moisture Deep Conditioning with just water and oil, I consider that an “Oil Based”
Conditioning. This Step, Step 13, I consider as an “Oil Based” Conditioning as well.

FIRST Wash Hair with Cheap Conditioner


MIX

4 TBS Olive Oil or Almond Oil

   OR 2 TBS of Olive
or Almond and 2 TBS of Coconut Oil (Melt in Microwave)

1 TBS Jojoba Oil (Optional)

NOTE: Any kind of Oil as long as it equal 5 Tablespoons


Apply to wet/newly washed hair, put on shower cap, wrap cap
with a towel for 20 min – 2hr.. Wash out hair again with cheap conditioner then
dry hair 90% and do Step 8 for Twist Outs.

THE NEXT FOLLOWING DAYS: Do the same thing as the rest of the days. 

STEP 11. Spritz, Twist Outs, Cover head for bed


2nd WEEK – Transitioning from Relaxed to Natural Hair

Posted on

I consider this STEP 12 and you do this on the 2nd weekend.  And yep, we’re conditioning again.  Conditioning is very very very very important so that your hair doesn’t have breakage.

STEP 12: SECOND WEEKEND/WASH: MOISTURE DEEP CONDITIONING

Wash Hair with Cheap Conditioner

MIX

1/3 cup olive oil  or Almond Oil

1/3 cup hot water


Apply this on mixture on wet/newly washed hair, put on shower cap, wrap
cap with a towel for 20 min – 2hr. Wash
hair again with cheap conditioner then dry hair 90% and do Step 8 for Twist
Outs.

THE FOLLOWING DAYS: Repeat Step 11. Moisturize your hair with the Spritz (3 part water and 1 part oil) at the end of your day (before bed) and do the Twists, oiling and rolling up the ends, and cover with a bonnet or silk scarf.  Do this every night until your next hair wash.


1st WEEK- Transitioning from Relaxed to Natural Hair

Posted on

So, being new at this, I’ll let you know how things go.  As I’ve said, I’ve done all my research on what to do from instructions on the internet. Then I tried it out. I found that EVERYONE had different measurements on how to do this stuff, so it took me a few tries to figure out what measurements were actually needed.  My hair goes a bit down to the middle of my neck, so hopefully these measurements might work for you.  If you have a lot of hair, you might need to add up a 1/2 a tablespoon or two.

My Steps

The 1st thing is to not perm your hair the next time you need it. My last perm/relaxer was in October 2010.  The 2nd thing is to start treating your hair as if it was already relaxed, and that’s what I’m doing now.

Make sure you take a look at the list I provided of all the stuff you will need before starting.

So…here we go

FIRST DAY

STEP 1: CLARIFYING – Wash hair with Baking Soda

Clarifying means you’re simply removing the buildup of stuff in your hair that makes it feel weighed down, limp, and/or extra greasy.  Clarify only when you need a “clean slate” or to make your hair “clear”.

MIX

1/2 Cup of Baking Soda

2 Cups of Water

Pour mixture into Empty Water Bottle.  Take off cap, and put 4mm hole in the center of the lid (My Hubby used a Reamer, you can also use a dremel…however you can to put a hold in the cap). Screw cap back on bottle. The hole in the cap will help pour solution into hair.

STEP 2: Apple Cider Vinegar Rinse (To also help Clarify hair)

MIX

1 Tbs Spoon of Apple Cider Vinegar

1 Cup of Water

Put in a empty Water Bottle, with the hole in the cap

NOTE: Use Apple Cider Vinegar BEFORE Conditioning helps to seal in the moisture better

STEP 2A: WASH HAIR

The Baking Soda and the Apple Cider Vinegar will separate from the water, so you’ll need to shake it up from time-to-time to get them back together.  Wet you hair and use the Baking Soda mixture first. Apply all over hair, massage the hair, and Rinse out.  Once you use up all the Baking Soda Mixture, then use the Apple Cider mixture all over the hair. Massage the hair, get it all over, and rinse out.  NOTE: I must say, that I missed my bubbles that I used for shampoo while I was doing this…but while transitioning, gottah get rid of shampooing because it dries out the hair.

STEP 3: PROTEIN DEEP CONDITIONING

(See below on more Information on Protein Deep Conditioning)

MIX

1 egg (use egg white only, remove yolk so that the egg, when on your head while warming, doesn’t cook in your head)

2 Tbs honey

2 Tbs olive oil or almond oil

1 jar of Gerber Banana (Optional)

2 Tbs of Coconut Oil (Optional)

 Always place this mixture on Wet Hair

SIDE NOTE:  If you don’t want to mix another container of stuff, you can also use Mayonnaise as a Protein Deep Conditioning, which can also be applied on dry hair

After applying mixture to hair, Put on Plastic Cap/Shower Cap and wrap with a towel. Your body will supply heat for the oil when wrapped with towel.

 Leave in for 20 minutes – 2 hours

STEP 4: Wash out Protein Mixture with a conditioner (which will also get rid of Mayonnaise smell if you used that). Any cheap Conditioner will do.

STEP 5: MOISTURE DEEP CONDITIONING

There are two main types of moisturizers: 1) water based and 2) oil based. “Oil based” moisturizers are best used when the hair is wet because it can trap in the moisture. “Water based” moisturizers are best used on dry hair because the water in the ingredients allows the other ingredients in the moisturizer to penetrate and moisturize. Since water actually penetrates the hair shaft, using a moisturizer with water as a base adds moisture back into the hair.  Step 5, I considered it, as an “Oil based”

NOTE: You should always Moisturize after a Protein Conditioning to prevent breakage. More about this at the very bottom.

MIX

1/3 cup olive oil  or Almond Oil

1/3 cup hot water

Apply this on wet hair. This will seal in the moisture

NOTE: Shea Butter and Oils only seals in moisture already in hair

Put on Plastic Cap/Shower Cap and wrap with towel. Wait 20min – 2hrs. Remember: Your body will supply heat for the oil when wrapped with towel.

STEP 6: Rinse out Hair

STEP 7: Towel Dry Hair. Let Hair Air out until 90% Dry.  Just need Very Damp Hair. NOTE: Do not do twist out on wet hair (unless you have a lot of time for it to dry) or it will be very frizzy and just a bad twist out.

STEP 8: TWIST OUT

I’m using this as a transition hair style or protective styles which means that the hair style keeps your ends “protected.”  What I read that you’re REALLY suppose to do is always have your ends tucked in and not left out for the elements to get to and cause breakage. On a YouTube video, one person said that having your hair down should be a treat and that it should mostly be UP for it to grow and stay healthy with no split ends.  But I’m going to do this nightly, always moisturizing the ends, and have my hair out during the day. If it doesn’t work, I’ll try something else.

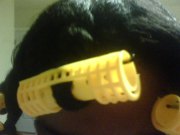
So what I do is part my hair in 4 sections. Make one (1) twist in each section of the hair, making a total of only four (4) twists. So you take a section of hair, then Put Coconut Oil at the ends, then separate the hair and twist the two pieces of hair together.  Put a roller (3/4 inch perm rod) on the ends about 1/3 of the way up for each twist as you go.

NOTE: Use Coconut Oil sparingly, or not at all, during winter since it will harden with temperatures under 75F. Or Add equal parts of other oils. The other oils (olive, almond, jojoba) will help keep the coconut oil from freezing.
1227002133

STEP 9: Put silk bonnet cap over hair or wrap up with silk scarf

STEP 10: Apply a small amount of Coconut Oil to your hands only (not to hair) in the morning. Carefully unravel twists. Start at roots.

STEP 11: DURING THE NEXT FOLLOWING DAYS

EVERY NIGHT: Use the Spray Bottle with water (can also add an oil like olive oil or almond oil in the bottle with the water) and damp the hair for moisture every night before you go to bed or in the morning (I consider this a “Water Based” moisturizing as stated in Step 5). The water and oil is your Spritz (3 part water: 1 part oil). Use the Wide Tooth Comb and gently detangle. 

Let your hair air dry to 90% and (Repeat Step 8) Re-Twist hair

Cover with bonnet or silk scarf

NOTE: Only comb hair when it’s really wet and comb from the
ends to the roots. Hold the relaxed ends and gently comb through each section going up, without the tangles. Also finger comb is better than using an actual comb.

++++++++++++++++++++++++

WHEN TO DO PROTEIN TREATMENT

The Protein Deep Conditioning strengths hair, especially at the demarcation line and will stop or minimize breakage, and helps to reduce frizz and fly-away hair–IT WILL NOT MOISTURIZE.

NOTE:  Water is the ultimate moisturizer. The moisture you apply needs to be held in by something. Oil.

Natural oils like jojoba, olive, carrot, or coconut oil seem to work best.

Only do a protein treatment when you need to. Do a hair strand test to evaluate whether or not you need a protein treatment

If your hair:

(When Wet or Dry) Stretches slightly and returns to its original length without breaking, you are balanced! Stick with maintaining!

(When Wet or Dry) Stretches a little more than normal then breaks, you need more protein in your regimen.

(When Wet or Dry)Stretches, stretches, stretches with no significant breakage yet, add a bit more protein to your regimen.

(Wet)- Feels weak, gummy, mushy, or limp, you need to add more protein to your regimen.

(Wet or Dry) Experiences very little to no stretching, and simply snaps or breaks, you need to increase the moisture in your regimen.

(Dry) Feels rough, tough, hard, dry, tangly, brittle, or any combination of those, you need more moisture in your regimen

Items you need to Transition Hair

Posted on

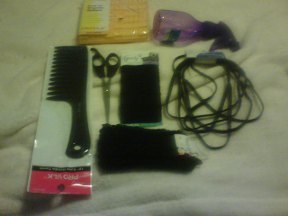
Okay, so I constructed a list of the items I needed to transition my hair from relaxed to natural.  Here you go…

  1. Baking
    Soda
  2. Apple
    Cider Vinegar (For those who don’t know, it’s not two separate containers; it is an actually bottle that says “Apple Cider Vinegar”)
  3. Honey (Yep, the Honey bee stuff)
  4. Extra
    Virgin Olive Oil
  5. Coconut Oil (or Extra Virgin Coconut Oil — I got the regular stuff LouAna)
  6. Aloe
    Vera Gel (e.g. 12 oz Fruit Of The Earth Aloe Vera Gel)
  7. Almond
    Oil (16 oz Optional)
  8. Jojoba
    Oil (4 oz Optional)
  9. 2 bowls
    (that can hold 2 cups of water)
  10. 2 Water
    Bottles (Empty the water out of the water bottle like Osaka
    or Dasani for example)
  11. Ice
    Pick, Dremel, or Reamer (Something to make a 4mm hole into plastic) and put a hole
    in each cap of the water bottles
  12. 3/4 inch
    perm rod (12 rollers)
  13. Shower
    Cap
  14. Silk or Satin Bonnet or Scarf
  15. Spray
    Bottle
  16. Wide Tooth Comb (and I mean W I D E – like 0.5 inches Teeth Wide)
  17. Towel
  18. Cheap Hair Conditioning (We’re not using any kind shampoo at all since it dries out the hair. So, if you already have some Hair Conditioning, just use that to wash your hair)

I couldn’t find Almond Oil or Jojoba Oil in Wal-Mart, and I only bought them because my husband and I happened to have a 30 minute wait for a restaurant we wanted to eat at and GNC (a nutritional supplement store) was next door and we went in. Everything else, I got at Wal-Mart down the cake/cooking aisle and at a Beauty Supply Store

1227001654


Why Transition to Natural Hair

Posted on

DSC00563 - CopyI wanted to make a blog where it tells you exactly what I did while transitioning my hair.  I’ve just started transitioning. My last relaxed hair was in October 2010.  I’ve done ALOT of research, for several months, on the Internet about how to transition your hair without the BIG CHOP. I’ve looked at blogs, YouTube and Websites on the “What To Dos”, and I’ve learned a lot of things before making my decision.

Why am I Transitioning
Well, I actually am just curious about the whole Natural thing. My mom and sister have both been natural for several years and their decision was simply a “just because”. My sister just kept putting her hair in extensions so that’s how she became natural, and my mom simply just stopped wanting the breakage in her hair and she did the Big Chop.  I decided to do it because I thought: 1) it would be a fun project and 2) I just had my daughter in July 2009 and I would like to keep her natural, which means I need to know how to do it, and 3) I was just sick of relaxing my hair every six (6) weeks.

Why not the BIG CHOP?
Well, I don’t want to go that short. Frankly, I’m just scared of that entire idea, and I like my hair length. But the MAIN REASON is that doing the Transitioning thing will actually HELP ME learn how to manage my hair while it is completely natural.  You can go get the Big Chop and then you would be like, “Okay, now what? What do I do?”  This way, I keep my hair, I’m learning as I go, and I’m not stressed out trying to figure out what not to do and what to do.

Being Natural is Too Much Money
You got that right! Everything I researched, and listening to my sister, I hear of all the bottles that are thrown away because they just don’t work for their type of hair. So, for me, I just didn’t want to spend all the money on “products”, so I decided I wasn’t going to go natural–just too much money!  Then, while researching one day, I found an answer!  TADA!!  FOOD!!!  Yep, Food!  If I can’t eat it, or wear it, I’m not using it. Yep, that’s right. Going Natural using Homemade Products and Recipes. So what does that mean? What kind of “products” are those?  Well, here’s a list.

  • Coconut Oil
  • Baking Soda
  • Extra Virgin Olive Oil
  • Apple Cider Vinegar
  • Honey
  • Aloe Vera Gel (Can’t eat but I can put it on my skin)
  • Almond Oil (Optional)
  • Jojoba Oil (Optional)
So, yeah, I can cook with Coconut Oil, and Baking Soda has all kinds of usages such as brushing my teeth, and soaking up odors in the refrigerator or washing cloths. And Apple Cider Vinegar I use on warts/moles, and to clean out my system. Honey I can put in my tea or on some bread rolls. And Aloe Vera, I can put on my rough feet. Almond OIl can be used to remove those dark circles under my eyes and a substitute for Olive Oil for salad dressings and also for cooking stuff. Oilve Oil I put on the bottom of a pot, add some popcorn kernels, and shake that bad boy — Popcorn Night for my Netflix Nights!! Jojoba Oil I can use on my rough skin too, especially as a Lip Balm.

I don’t have enough time to go Natural
Me Neither! I started during the Holidays so that I can have some three-day weekends to get myself started. And while I’m figuring things out, I’ve been making a list. I don’t want to keep constantly working on my hair. I’m a new parent!  And I’m still not getting much sleep at night with my daughter waking up and her constant colds. So I don’t have time, and I only have 5 minutes to do my hair in the morning before my 1-hour commute to work.  But I figured out that I really haven’t added too much more time than what I’ve been doing with my hair before.  The added time, for now, is just my trying to figure out what to do. Let’s compare

My Regime for Relaxed Hair
Once a week wash hair with shampoo and conditioner while taking a shower and then air dry or blow dry — (40 minutes)
Nightly roll up of hair (Just a mushroom of rollers around my head) — (10 minutes)
Morning comb/brush hair back and place in banana clip — (5 minutes)
Every six (6) weeks relax/shampoo/air dry hair (2 hours)
My Regime for Transitioning to Natural Hair
Once a week wash hair with conditioner while taking shower (20 minutes)
Once a week condition hair by putting under shower cap/rinse out/air dry (30 min – 1-2 hours–depending if I get too interested in watching a movie or doing house chores)
Nightly spritz hair, comb and make 5-12 twist in hair (15 minutes)
Morning, take out twists and hair is done (3 minutes)
If twists don’t come out right, pull hair back with a hair band, and pin under (3 minutes)
So, yes, it’s a bit more extra time to go Natural because of the air drying and the weekly conditioning of my hair, which is required to keep it from breaking. But I figure, once I’m all natural, I wouldn’t have to do so much conditioning, and I’ll be right back down to the exact time for hair management as when I had relaxed hair.